A chest freezer is deep, wide, and shelf-free, which is why it swallows food. Bags slide to the bottom, heavy roasts bury small packages, and every search means leaning in and digging.
Learning how to organize a chest freezer means working with that depth instead of fighting it. The system below uses bins that lift out like drawers, a fixed layer order, flat-frozen bags filed upright, and an inventory list on the lid.
Plan about an hour for the first setup. Work in stages and keep a cooler nearby, so food stays cold while you sort.
Step 1: Empty, Sort, and Map the Well
Take everything out in sections and sort by type: proteins, ready meals, vegetables and fruit, bread, and bulk items. Toss anything unrecognizable, undated, or badly freezer-burned. This sort becomes your map.
Count each group before you buy a single bin. A freezer holding mostly bulk meat needs fewer, larger bins. One holding many small bags needs more, smaller bins. The map decides bin sizes, not the other way around.
Step 2: Choose Bins That Work Like Drawers
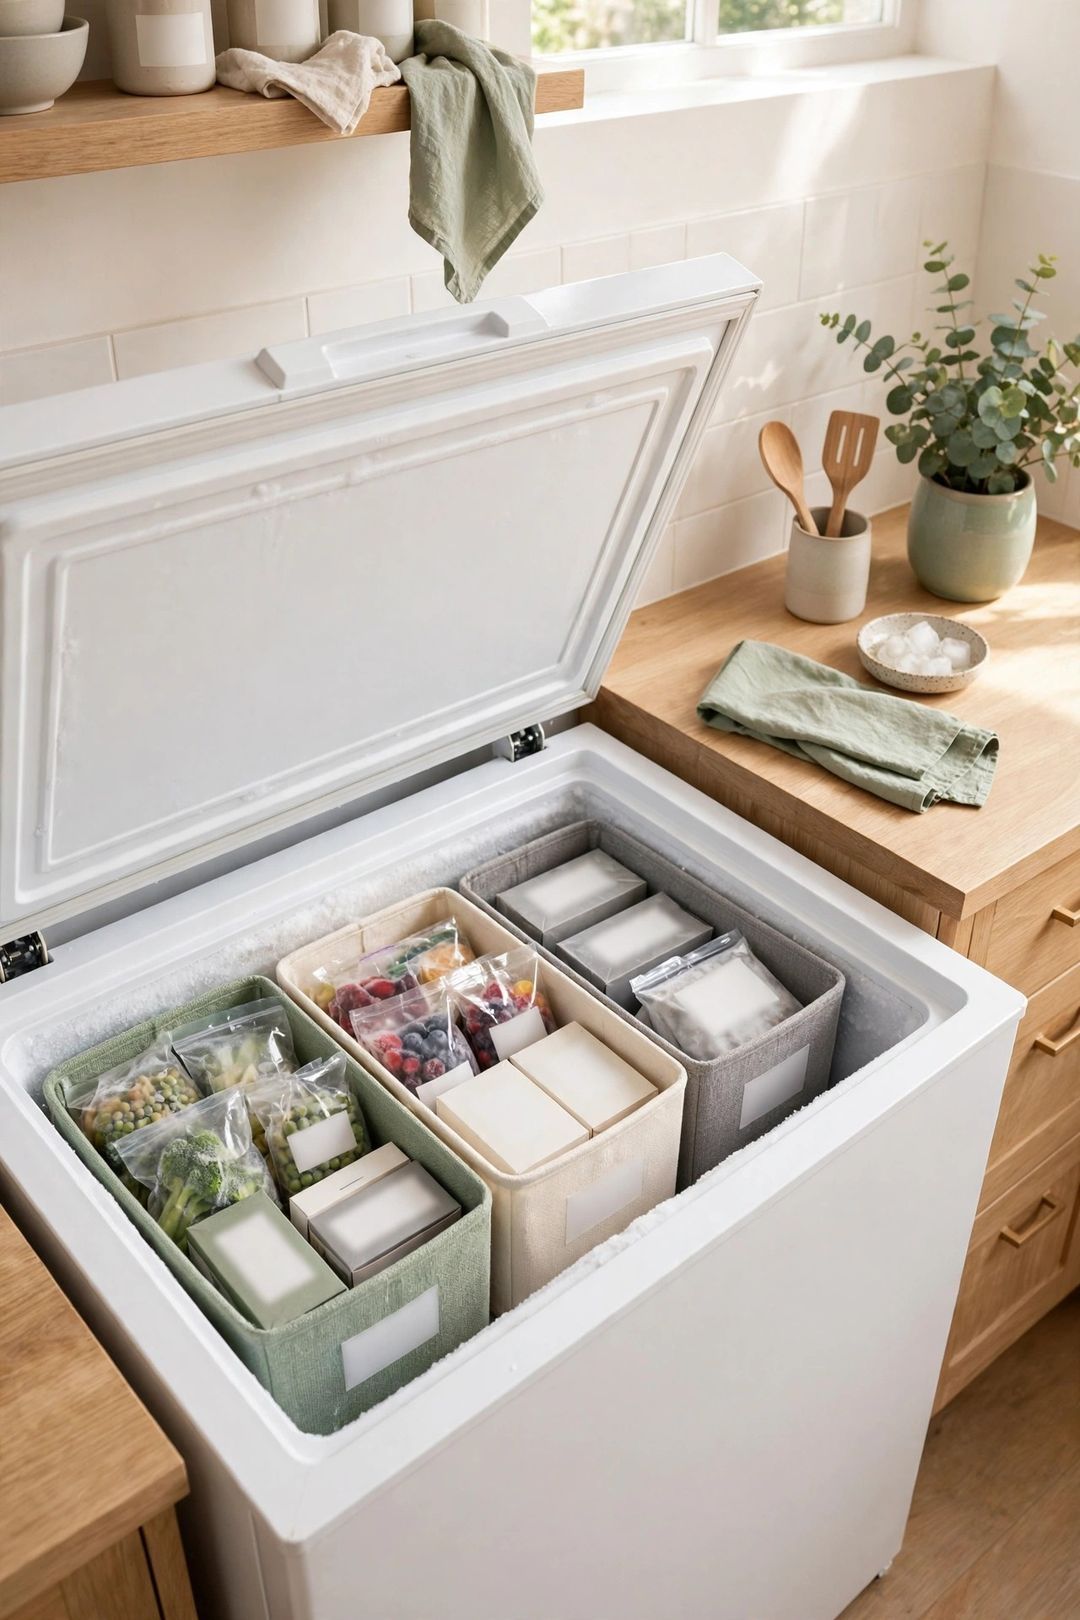
In a chest freezer, bins are your drawers. Every item should live inside a bin, crate, or handled bag that lifts straight out. Loose items are banned, because a loose bag will always sink and vanish.
Choose sturdy, open bins or crates with handles, sized so two or three sit side by side across the freezer floor. Leave a small gap around each bin for cold air and fingers. Assign one job per bin: chicken, beef and pork, ready meals, vegetables and fruit. When a bin is full, that category is full.
Step 3: Set the Layer Order, Bottom to Top
Give each layer a job based on how often you reach for it.
Bottom layer: long-term and bulk. Place large roasts, whole turkeys, bulk bags, and seasonal stock at the very bottom. You reach for these rarely, so they can bear the digging.
Middle layer: regular proteins and meals. Set the main protein and ready-meal bins here, above the bulk layer but below daily items.
Top layer: everyday and use-first. Keep the most-used bin and a small use-first bin on top, plus the hanging basket. Anything grabbed several times a week should never require moving another bin.
Step 4: Flat-Freeze Bags and File Them Upright
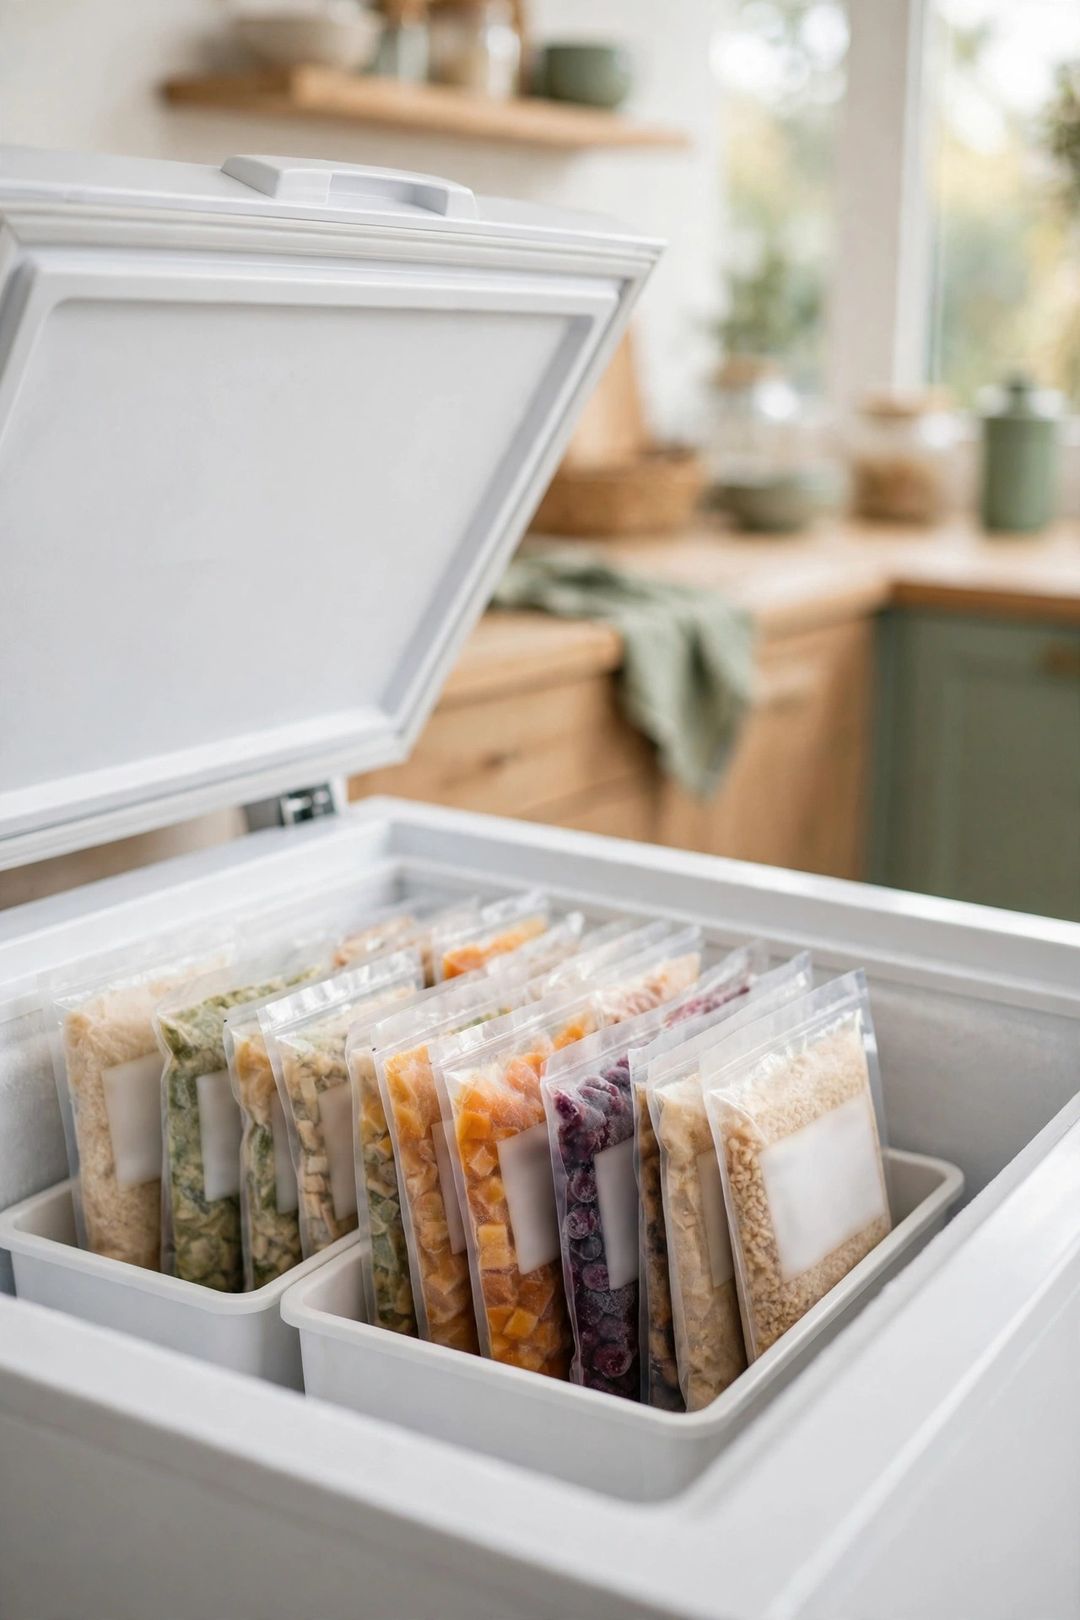
Flat freezing matters even more in a deep freezer, because flat bags file without air pockets and frozen lumps. Put soups, sauces, and ground meat in heavy freezer bags, squeeze out extra air, seal, and lay them flat on a tray until solid.
Once solid, file the bags upright inside their bin, like folders in a drawer, labels facing the same way. Filing keeps every bag visible when the bin lifts out. A bag laid flat on a pile becomes the lid you dig under, so file instead of stacking.
Step 5: Divide Small Items
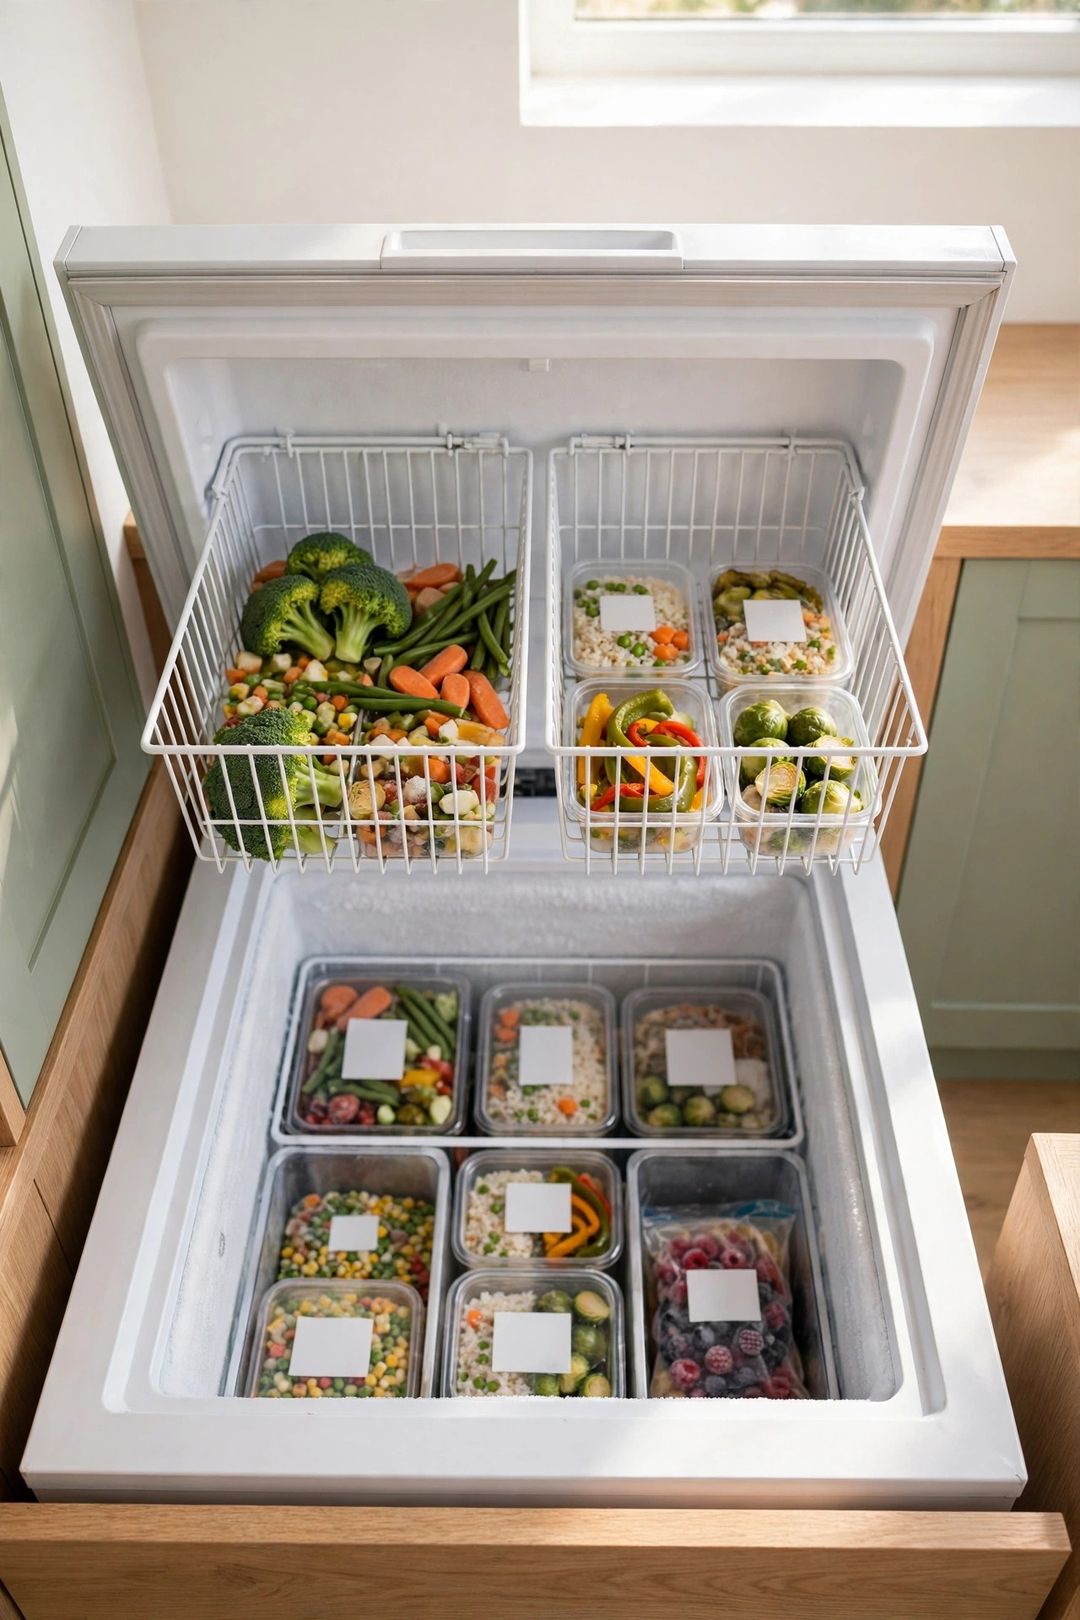
Small packages cause most of the digging. Give them a divided home inside one top bin. Use small containers or dividers to separate butter, cheese, herbs, and single servings.
Keep ice packs upright along one wall, not buried in food bins. Stand bread in its own bin so it is not crushed under meat. If your freezer has a hanging basket, reserve it for these small, light items only. A basket overloaded with heavy meat sags and blocks the bins below.
Step 6: Put the Inventory on the Lid
A chest freezer needs an inventory most, because you cannot see contents at a glance. Tape a list inside the lid, where it is read every time the freezer opens. List only big and buried items: proteins, ready meals, and bulk buys, with the month and year each went in.
Add a line when food goes in and cross it off when it comes out. Keep a pen clipped beside the list. A phone note can be a backup, but the lid list wins because it is in your hand when you need it. Review it before writing any grocery list.
Step 7: Restock by Rotation, Not by Tossing on Top
New food tossed on top is how the pile restarts. Follow a rotation rule instead: new items go to the bottom or back of their bin, and older items move to the top or front. This is first in, first out, bin by bin.
Once a month, lift each bin out in turn. Check dates, move anything close to its limit into the use-first bin, and wipe out loose ice and crumbs. Ten minutes a month stops the slow slide back into a pile.
What to Buy
Sturdy handled bins or crates, typically $18–$32 for a set. Best for the drawer system. Pro: Handles let you lift a full category out at once. Con: Thin plastic can crack when frozen and loaded. Skip if: You already have well-fitting crates to assign by category.
Heavy-duty flat freezer bags, typically $8–$15. Best for soups and ground meat. Pro: Thick bags resist tears and freeze flat for filing. Con: Single-use bags add ongoing cost. Skip if: Reusable containers already hold most liquids.
A hanging freezer basket, typically $12–$22. Best for small everyday items. Pro: It uses top rim space and keeps small packages out of deep bins. Con: It only fits certain widths, so measure first. Skip if: Your freezer already includes a basket.
A dry-erase board or laminated sheet, typically $7–$14. Best for the lid inventory. Pro: It wipes clean and stays in one fixed place. Con: It only works if items get crossed off. Skip if: A paper list already stays current on your lid.
Freezer tape and a marker, typically $6–$12. Best for labeling bags. Pro: Tape sticks in cold and damp, so dates survive. Con: Labels need a dry surface. Skip if: Writing on bags already stays legible.
Mistakes to Avoid
- Storing anything loose. A loose bag sinks and disappears. Every item belongs in a lift-out bin.
- Putting new food on top of old food. New items belong at the bottom or back of their bin, so oldest food gets used first.
- Using one giant bin for everything. A single deep bin rebuilds the pile inside a box. Use several smaller bins, one job each.
- Skipping the lid inventory. Without a list, buried food is forgotten food.
- Packing the freezer solid. A jammed freezer blocks airflow and makes bins hard to lift. Leave a gap around each bin.
Frequently Asked Questions
What should go on the bottom of a chest freezer?
Put items you use least at the bottom: bulk meat, large roasts, whole birds, and seasonal stock. Everyday proteins, ready meals, and the use-first bin belong in the middle and top layers.
How do you stop digging in a deep chest freezer?
Use bins that lift out like drawers, one category per bin, with the most-used bin on top. Lift the whole bin to the counter, take what you need, and drop it back. If you are moving loose bags to find something, that item needs a bin.
How many bins does a chest freezer need?
Most work well with four to six bins: one or two for proteins, one for ready meals, one for vegetables and fruit, one for bread, plus a small use-first bin on top. Match one bin to each large group from step one.
How often should the inventory be checked?
Cross items off every time food comes out, and do a full check once a month when you rotate bins. Fix any missed lines, and move older items into the use-first bin.
A chest freezer with lift-out bins, a clear layer order, and a lid inventory stops being a guessing game. Save this post to your Kitchen Organization board on Pinterest so the system is handy on stock-up day.