The morning rush is hard enough without digging through a tangled pile of spatulas, whisks, and tongs just to flip an egg. A drawer can be full and still waste half its space if long tools, short tools, and odd shapes all land in one open box.
These utensil drawer organization layout ideas give you ten different ways to set up that space, from simple trays to full drawer-in-drawer systems. Pick the layout that matches your drawer size and the tools you reach for every day, not the one that just looks neat in a photo.
Start by emptying the drawer and grouping what you own: cooking tools, prep tools, serving pieces, and rarely used gadgets. Measure the inside width, depth, and height before choosing anything below, because a half inch decides whether a tray fits or sticks.
Layouts That Stretch a Standard Drawer: Ideas 1 to 3
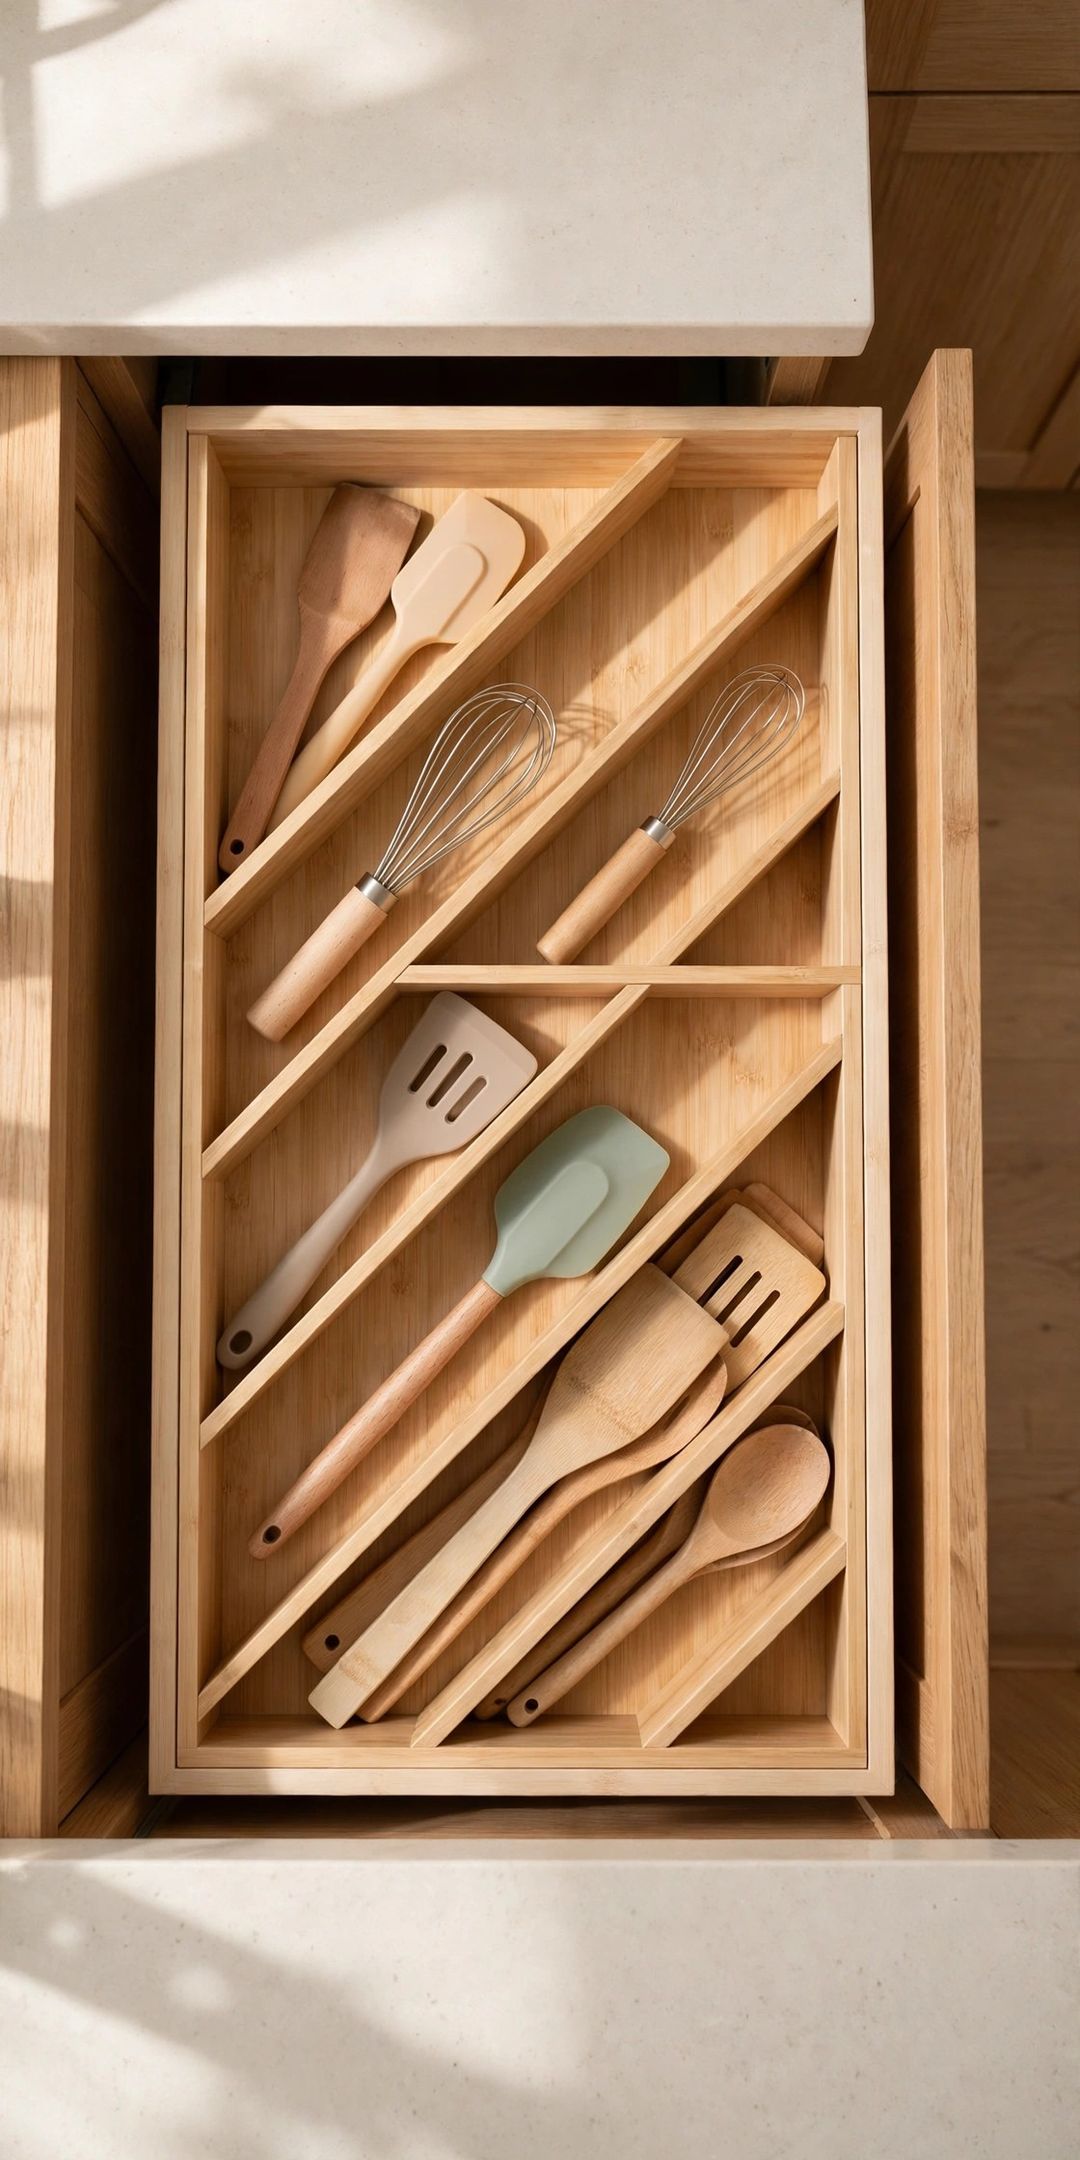
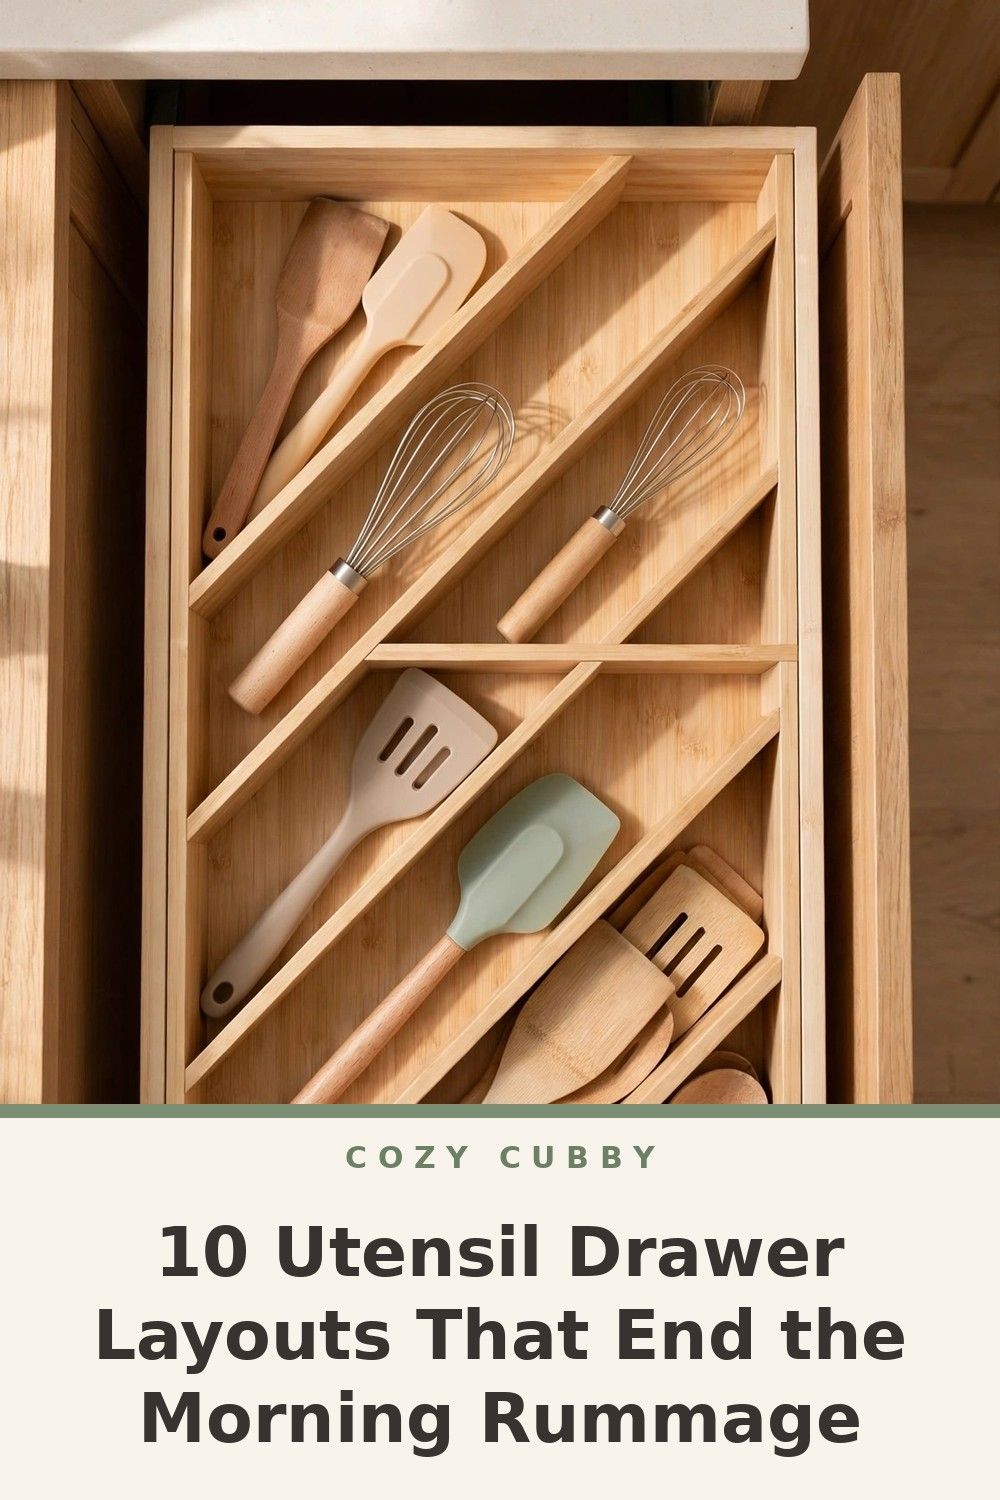
1. Diagonal insert for long tools. A diagonal divider runs corner to corner and creates longer channels than straight sections. Whisks, tongs, ladles, and rolling spatulas that never fit a standard tray sit flat here. The triangle corners suit short items like peelers and timers.
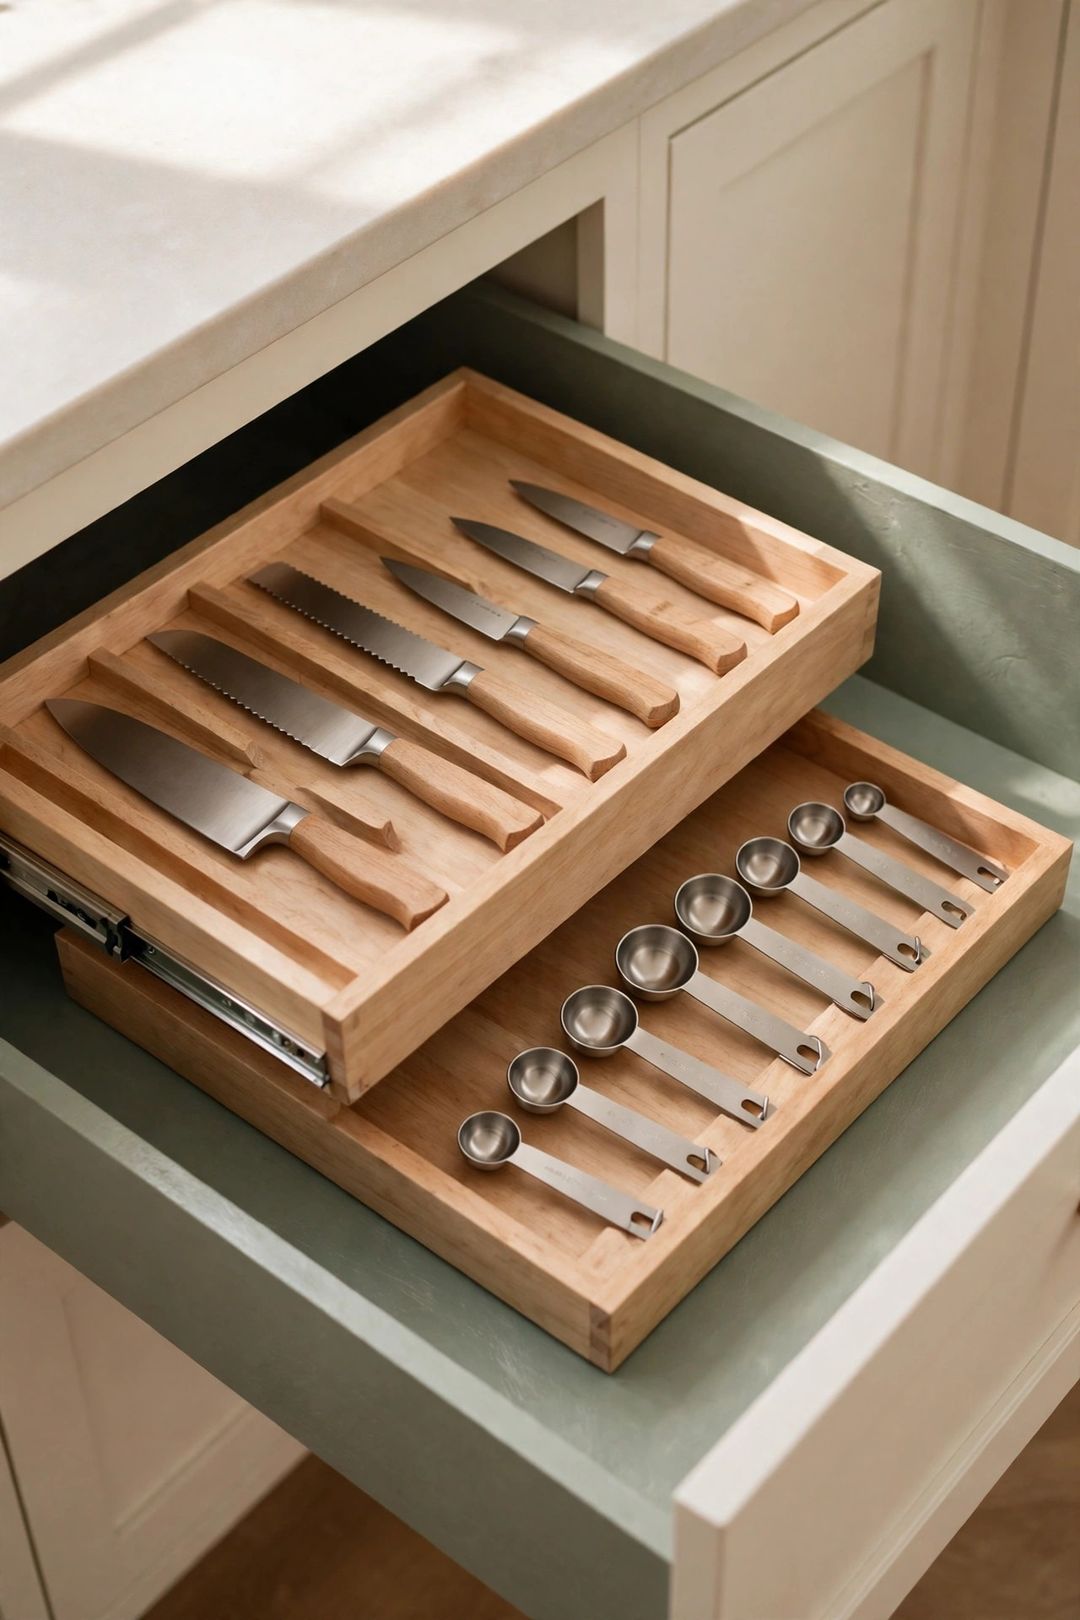
2. Double-layer tray. A shallow top tray slides or lifts over a deeper bottom layer. Keep daily tools on top and less-used items, such as a meat mallet or extra tongs, underneath. This layout nearly doubles one drawer without changing the cabinet.
3. Expandable tray with open sides. An adjustable tray widens to fill the drawer edge to edge, so nothing collects in the gaps. Leave one long, open channel beside it for oversized tools. This is a good first fix for renters because nothing is fixed in place.
Layouts Built Around How You Cook: Ideas 4 to 6
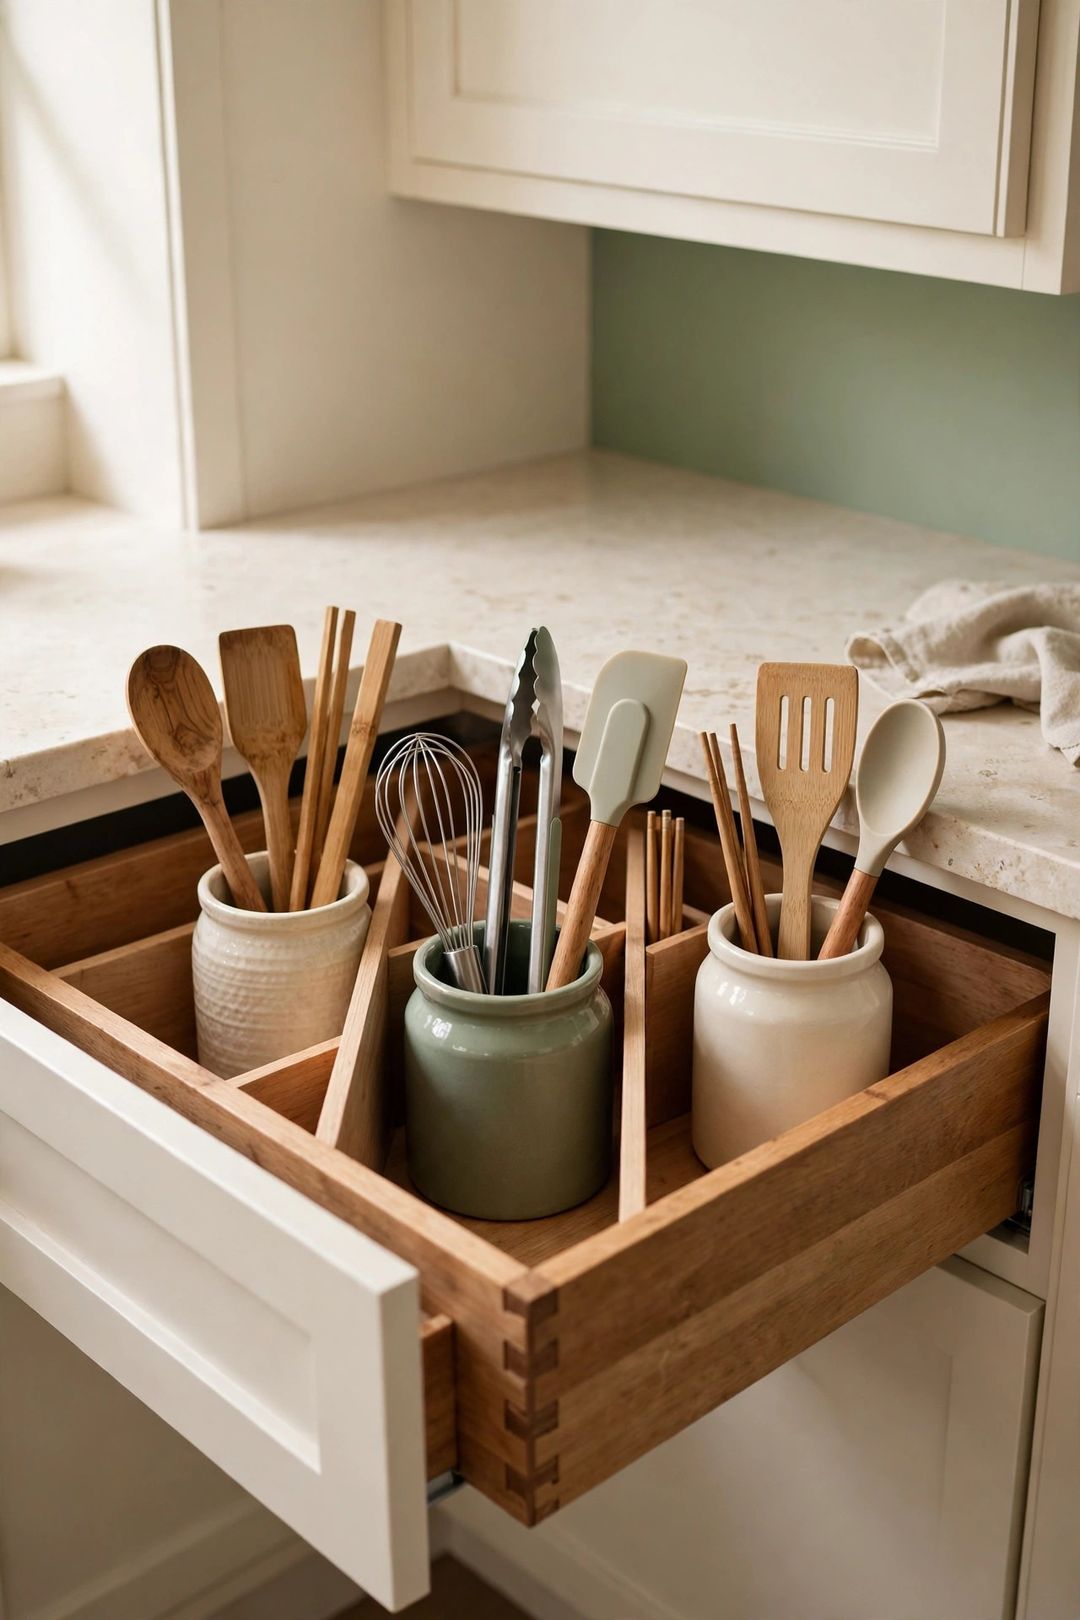
4. Zones by task. Split the drawer into clear zones: prep on the left, stovetop tools in the middle, and serving pieces on the right. Put the drawer beside the stove or prep counter, then match the zones to where you stand. Tools stop migrating once each one has a home zone.
5. A knife-free cooking-tool drawer. Move knives to a magnetic wall strip, an in-drawer knife block, or a separate narrow drawer. Without blades mixed in, spatulas, spoons, and turners can sit in wide open sections, and reaching in feels safer and faster on busy mornings.
6. Junk-drawer conversion. If utensils overflow while a nearby drawer holds random batteries, menus, and cords, swap them. Move the true junk into one small divided tray and give utensils the bigger drawer. Cooking tools get used daily, so they deserve the prime spot near the stove.
Layouts for Deep, Wide, and Odd Drawers: Ideas 7 to 10
7. Drawer-in-drawer. A hidden shallow drawer sits inside the top of a deep drawer, holding flatware or short utensils above pots and tools below. It uses the empty upper space deep drawers usually waste. Check the total height carefully before ordering this kind of insert.
8. Upright dividers in a deep drawer. In a drawer at least 8 inches deep, stand utensils upright in divided sections or sturdy cups, handles up. You can spot each tool at a glance instead of lifting layers. Keep heavy or sharp items lower or elsewhere so the drawer stays balanced.
9. Modular pods you can rearrange. Small separate boxes and cups click or sit together in any pattern, so the layout can change when your tools do. Use one pod for baking tools, one for tongs and openers, and one narrow pod for straws, skewers, and chopsticks.
10. The two-drawer split. If you have two shallow drawers, stop forcing everything into one. Put everyday cooking tools in the top drawer and specialty items, such as pasta servers, corn holders, and holiday tools, in the second. Both drawers stay calmer, and daily cooking gets faster.
What to Buy
A diagonal drawer insert, typically $18–$30. Pro: Creates long channels for whisks, tongs, and ladles that defeat standard trays. Con: The corner triangles waste a little space. Skip if: Your tools are mostly short and a basic tray already fits them well.
A double-layer or sliding tray, typically $20–$35. Pro: Adds a hidden second level without new cabinets. Con: The bottom layer is easy to forget and overfill. Skip if: Your drawer is under 4 inches deep, since two layers need height.
Adjustable dividers, typically $10–$18 for a set. Pro: They fit odd drawers and change as your tools change. Con: Spring styles can slip on smooth drawer bases. Skip if: You prefer one solid tray you can lift out to clean.
Modular organizer pods, typically $14–$24 for a set. Pro: You buy only the shapes you need and rearrange them freely. Con: Small pods can slide around without a non-slip mat underneath. Skip if: Your drawer is very narrow and a single tray uses the space better.
Mistakes to Avoid
- Buying the tray before measuring. Inside width, depth, and height all matter, and drawer slides often steal space at the sides.
- Keeping every gadget you own. Two broken peelers and a tool you never use will crowd out the spatula you reach for daily.
- Mixing knives loose among utensils. Loose blades dull faster and make every grab a careful one. Give knives their own spot.
- Filling every section completely. A drawer packed to the top tangles again within a week. Leave a little room in each section.
- Putting the drawer far from the stove. The best layout fails if cooking tools live across the kitchen from where you cook.
Frequently Asked Questions
How deep should a utensil drawer be?
A standard drawer 4 to 6 inches deep suits most flat layouts and double-layer trays. Upright storage needs at least 8 inches. Measure your longest tool lying flat, too, since depth front to back matters as much as height.
What goes in a utensil drawer versus a crock?
Keep daily stovetop tools in whichever spot is closest to the stove. Many kitchens work well with a small crock for three or four top tools and a drawer for the rest, which keeps both from overflowing.
How do you stop organizers sliding around?
Cut a non-slip drawer liner to fit the base, choose a tray sized close to the drawer, or add small clear bumpers at the tray corners. A tray that fills the width rarely moves at all.
How many utensils should one drawer hold?
There is no set number, but each tool should be visible or reachable without moving more than one other item. If you have to dig, the drawer holds too much or the layout needs clearer zones.
Choose one layout, measure twice, and give every tool a set place before tomorrow's breakfast rush. Save this post to your Kitchen Organization board on Pinterest so the sizing tips are handy when you shop.